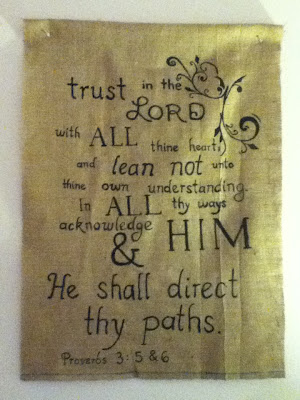
When we moved into our new apartment, the walls were huge and bare. I just couldn't STAND how empty they made the house feel! So using some recycled goods and creativity, I transformed some burlap from the wedding and created a lovely wall hanging for our living room! I LOVE this piece of wall art! And because of it, I have gotten many compliments, and even some requests! I guess I have Christmas presents figured out for this year ;)
Supplies
A big piece of burlap
A quote to copy or design plan
A small paint brush
Acrylic paint
Directions
First, cover your work space, because the burlap lets through paint with its holes.
I used a big piece burlap (left over from our wedding) and cut into a 3'3" by 2'3" (Not purposely, it just looked good size wise!).
I then took a favorite quote (I really wanted to use: Proverbs 3:5 &6 from the bible "Trust in the Lord with all thine heart; and lean not unto thine own understanding. In all thy ways acknowledge him and he shall direct thy paths.") and played with some positioning and fonts I liked and sketched it on a piece of white paper.
Then, with some black acrylic paint, and a thin brush... I started painting slowly and carefully the words and lay out I choose.
It is simple but does take a little bit of patience and time to get the letters right.
If you are afraid of mistakes, definitely sketch out your words first and practice... because once you paint the burlap.... it is there.... sorry! But the finished product is worth the time!
I added a little swirly design to the corner of the quote to create an artsy look; your options are limitless!


